

Understanding Your Velux Blinds
Velux blinds are designed specifically for Velux windows, enabling seamless control over light and privacy. To prolong their sleek aesthetic and optimal function, understanding their structure and materials is key. This baseline knowledge can save you from unintentional damage during routine cleaning or mechanical adjustments.
The first thing to recognise is that Velux blinds are engineered for sloped or roof windows, meaning they endure more direct sunlight and moisture compared to standard blinds. Because of this, specialised coatings are often applied to the fabric, which helps with glare reduction, solar heat control, and moisture resistance. However, these coatings can degrade with incorrect cleaning methods or neglect. Proper attention to manufacturer recommendations and careful handling will prevent premature wear and tear.
There are several types of Velux blinds offered, such as blackout, roller, pleated, and venetian. Each comes with unique materials like aluminium slats, fabric layering, or honeycomb plastique composites, and each requires corresponding cleaning care. For instance, blackout and roller Velux blinds may trap dust along the side rails and on the back of the blind, unseen when closed. Meanwhile, pleated or venetian styles may require extra attention between folds and slats. Familiarise yourself with the model installed in your home for personalised maintenance practices.
Getting acquainted with your Velux blind model also allows you to notice any lint buildup, material fraying, cord issues, or mechanical sluggishness early on. Minor issues like hesitating retraction or slight surface fading can be addressed easily if caught early. Waiting too long could render the blind dysfunctional or unattractive, leading to unnecessary replacements or costly repairs. Understanding these subtle signs from the outset ensures your blinds remain as pristine as the day they were installed.
Regular Cleaning Keeps Dust Away
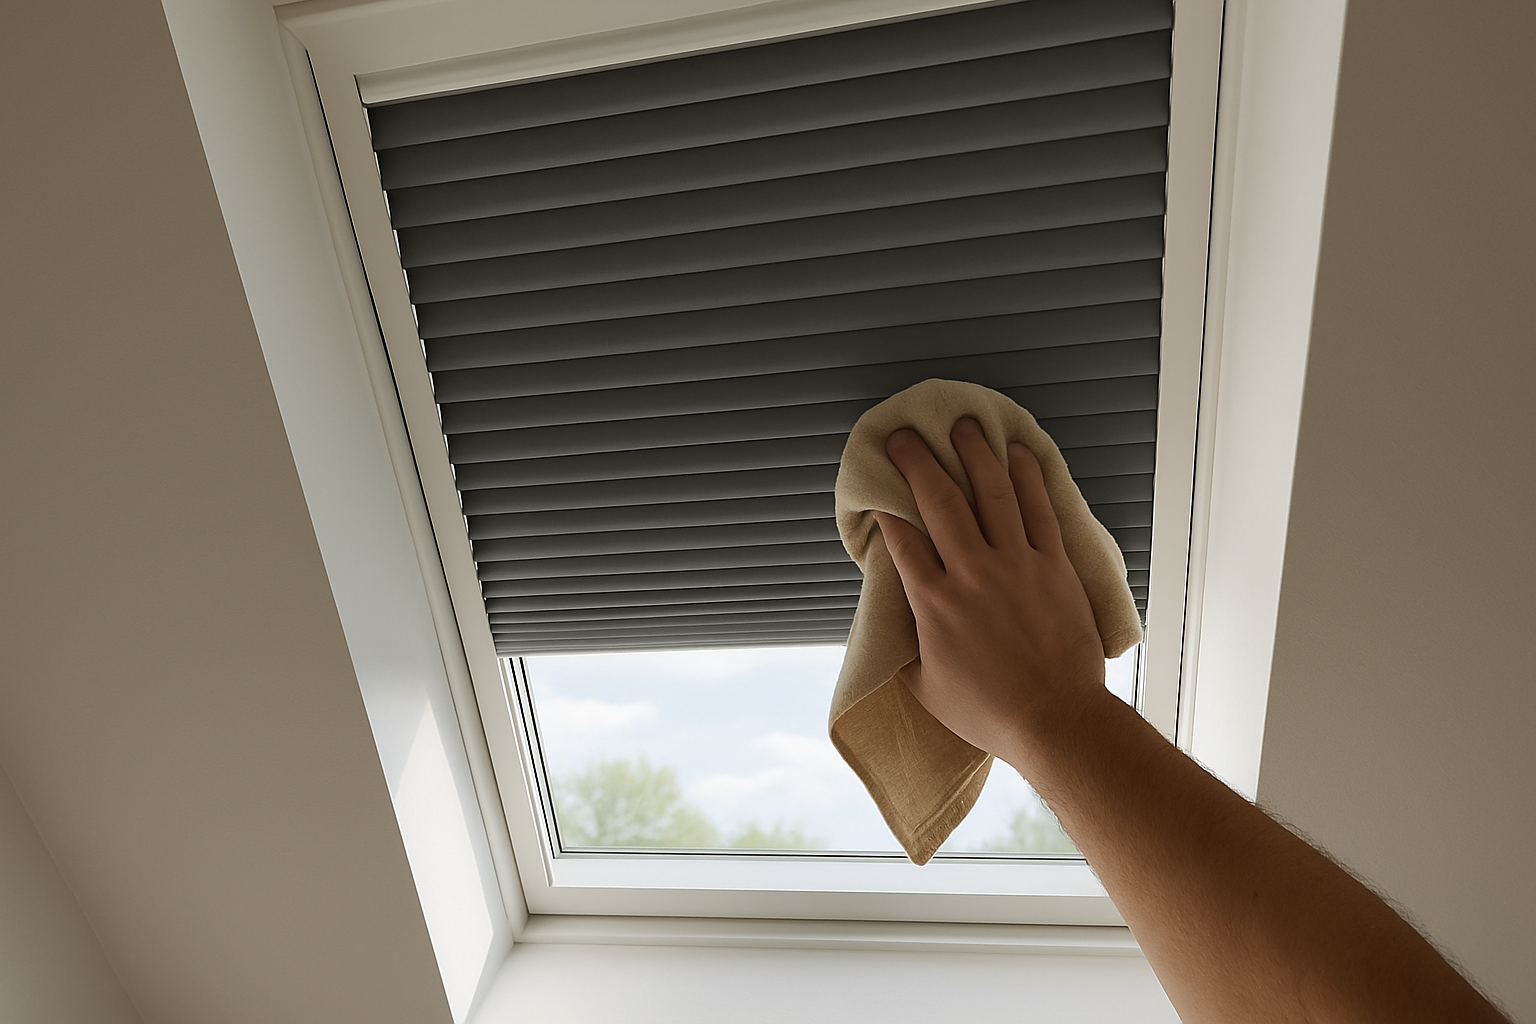
Dust is one of the primary culprits behind dull and faded-looking Velux blinds. Frequent cleaning helps maintain the original texture and colour while also reducing allergens in your indoor air. The good news is that it doesn’t require specialised equipment—just a consistent schedule.
Use a soft microfiber cloth or a vacuum soft brush attachment to gently clean the blind surfaces. Always close the blinds fully before cleaning to maximise surface exposure. Rollers and pleated blinds often trap dust along the edge seams or in folds, so take your time to clean those areas carefully. If you have aluminium or PVC finishes, avoid harsh scrubbing, as some abrasives can strip protective coatings or cause scratches.
For Velux venetian styles, dusting between each slat is crucial. Begin at the top and work your way down to prevent recontaminating cleaned sections. Slightly tilting the slats as you go makes it easier to reach both sides efficiently. To make it easier, you might consider a slat-cleaning brush, which can cover multiple rows in a single sweep. Just ensure the bristles are soft and suitable for the material of your blinds.
Set your cleaning frequency based on environmental factors. If the window is opened frequently, or you live near a main road where fine particulates are prevalent, clean every two weeks. For low-contact areas, monthly cleaning may be sufficient. What’s important is to stick with your schedule to prevent long-term grime buildup that can become abrasive over time.
To complete your Velux blinds care routine, remember to clean the window frame too. Built-up grime around the frame can transfer to the blinds each time you adjust or draw them. Whether you’re maintaining Roller Blinds or Velux systems, consistent upkeep enhances performance and preserves style appearance.
Dealing with Stains and Spills Appropriately
Accidents happen—be it a splash from a nearby kettle or enthusiastic kids with drinks—but addressing stains on Velux blinds immediately is vital to prevent permanent marks. Spot-cleaning quickly can prevent deeper absorption into fabric folds or rail channels.
Start by identifying the material of your blinds. Use warm water and a non-detergent soap solution for fabric-based Velux blinds. Gently blot the area with a soft sponge—avoid vigorous rubbing, which can warp fibres or lead to streaking. Never soak fabric blinds, as excessive water can dissolve adhesives or mould fabric contours out of shape.
For blinds made from PVC or with a glossy finish, using a diluted vinegar solution can be effective in breaking down greasy fingerprints or smudges. Always test any substance on a hidden patch first to ensure no discolouration. Once cleaned, gently pat the area dry with a clean cloth. Let it air dry fully before retracting to avoid mildew growth or material bloat.
If the stain persists after the first attempt, repeat with a slightly thicker diluted mix—never increase the chemical strength prematurely. Some food or ink stains may require specialist textile stain removers. If in doubt, consult with a professional or seek advice from your Velux supplier to ensure appropriate methods that don’t void warranty terms or product finish quality.
For homes that also use Wooden Blinds or other material options, consider different stain management techniques suited to each style. Staying informed enhances your capability to address all household blinds with confidence and care.
Maintaining the Mechanism and Moving Parts
Aside from aesthetics, functionality is paramount to Velux blinds. Their smooth operation largely depends on the state of their internal components—springs, cords, tension brackets, and gliders. Over time, accumulated dust or misalignment can disrupt smooth panelling or hinder extension and retraction performance.
Start by checking the mounting brackets and tension cords every few months. If you notice difficulty in rolling the blinds up or down, the mechanism might need retightening or realignment. Use a screwdriver to tighten any visibly loosened screws, usually found at the top corners of the fixture or inside the Velux track housing. Extend the blinds fully and retract slowly to observe tension consistency.
Lubricating metal brackets or rail gliders with a silicone-based spray can help eliminate creaking noises and improve glide function. Avoid oil-based lubricants as they attract dust and may leave greasy residue on blinds, especially fabric ones. If you do apply lubricant, wipe any excess immediately with a dry cloth to prevent drips onto lighter-colored surfaces.
Should the blind mechanism feel slack or over-tightened, consult your Velux model handbook or visit a professional. Often, replacing a worn-out part can restore full functionality instead of a complete replacement—a useful cost-saving strategy for many homeowners. Pay close attention to cord tensions; any visible fraying should prompt an immediate part replacement.
Regular operation testing not only maintains optimum interior comfort and light control but ensures your Velux blinds retain their premium performance. Scheduling light maintenance sessions every six months can prevent most technical issues before they manifest into tedious repairs.
Preventative Measures for Long-Term Appearance
Keeping Velux blinds looking as fresh as installation day is not just about reactive cleaning—it’s about actively preventing damage in the first place. Smart daily habits and environmental awareness can extend the lifespan of your blinds while maintaining their pristine look.
Here are some practical tips to follow:
- Avoid placing heaters or electric fans close to your blinds to reduce uneven thermal stress or deformation.
- Close blinds during peak sun hours to prevent UV fading and discolouration of delicate fabrics.
- Install insect nets on windows to keep outdoor particles like pollen and cobwebs off the blind surfaces.
- Always pull blinds using the handle or specified pull tab—yanking elsewhere can skew alignment or damage edge seals.
Humidity control is also vital. Velux blinds installed in bathrooms or kitchens can experience steaming and condensation. Consider pairing such rooms with PVC Waterproof blinds where appropriate. Where Velux blinds are preferred, ensure the room is well-ventilated, and periodically wipe down the window frame to reduce moisture accumulation. Mold can silently creep onto untreated sections, especially near the top rail or below folds.
If pets or children regularly come into contact with the blinds, consider installing restricted controls or obstacle-avoiding fixations. Teach young ones not to tug or climb near blind cords. Every extra step taken towards caution truly makes a difference in upholding the look and reliability of your Velux blinds over the years.
Seasonal Maintenance and Storage Considerations
Your Velux blinds may not always be used year-round, especially for rooms like loft spaces, guest bedrooms, or conservatories. As the seasons change, your maintenance practices should adapt accordingly. This ensures your blinds remain protected during harsh conditions like winter dampness or summer overheating.
During spring and autumn, schedule a full inspection and deep clean. Spring cleaning helps remove trapped winter grime and prepares blinds for stronger sunlight exposure. Likewise, autumn maintenance prepares materials for cooler temperatures and damp-prone weather. Cleaning before storage or closing blinds for extended periods allows you to prevent mildew buildup and fabric degradation.
If you plan to keep the blinds unused for weeks or months—like in second homes or seasonal loft conversions—consider storing them if the model allows detachment. Gently roll and wrap them in breathable material such as cotton or muslin to prevent dust saturation or pressure marks. Avoid plastic wraps, which can trap moisture inside, especially in wooden-framed